
Spec-Driven Development in Action with GitHub Speckit

In a previous article titled Vibe Coding vs spec-driven development, I explored spec-driven development and compared it with vibe coding. The central idea was straightforward: when a project becomes more complex, a clear and well-defined specification often saves more time than it costs.
In this article, I want to move from theory to practice by showing how I applied that approach in a real example using GitHub Speckit. I will walk through how I used it to shape a checkout payment flow and share the steps I followed along the way. What interested me most was the way it encouraged a more disciplined and collaborative development process.
Disclaimer: This article was drafted with the assistance of AI tools to refine the structure and clarity, but the core analysis and technical viewpoints are based on my own professional experience as a Data and AI Architect.
Why This Approach Matters
A strong specification makes the delivery process feel more grounded rather than treating requirements as something written at the beginning and then left behind. That distinction matters. In many projects, requirements are scattered across notes, tickets, and informal conversations, which can quickly lead to drift and misalignment.
Keeping behaviour, API contracts, and edge cases in one place helps create a more transparent and easier-to-reason-about system as the feature evolves.
The Workflow I Follow
When I work with Speckit, I tend to follow a deliberate sequence that keeps the work anchored in the spec:
- Specify: Define the feature clearly, including the user experience, expected behaviour, and key edge cases.
- Plan: Turn the specification into a technical plan that outlines the architecture, API contract, and implementation approach.
- Task: Break the plan into smaller, actionable work items so the implementation remains manageable and reviewable.
- Implement: Use the spec as the source of truth while generating and refining the actual feature.
This sequence helps keep the project moving forward without sacrificing the most important ingredient: shared understanding.
What I Built
The example I used was a small checkout payment flow. My goal was to create a simple experience that could handle the core steps of a payment interaction while remaining easy to reason about. In practical terms, I wanted the flow to:
- accept a payment method,
- verify card details,
- handle declined transactions gracefully,
- and make both success and failure states obvious to the user.
The value of this example was not in its complexity, but in how clearly it demonstrated how a structured workflow can support implementation from the outset.
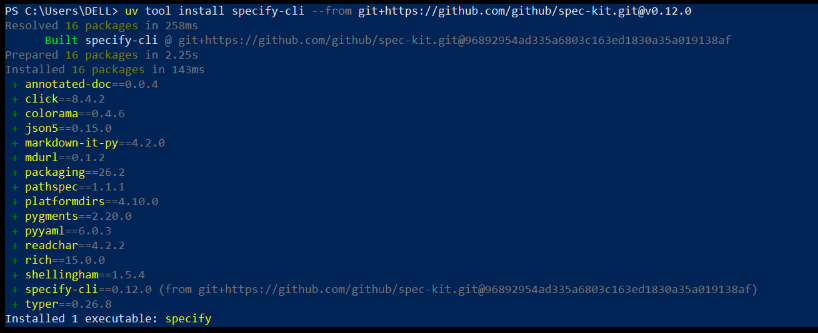
Step 1: Initialise Speckit via the Specify CLI
The first step was installing Speckit and setting up the project with the Specify CLI. The installation itself was straightforward, and once it was in place, the setup created the initial structure needed to begin working with the tool.
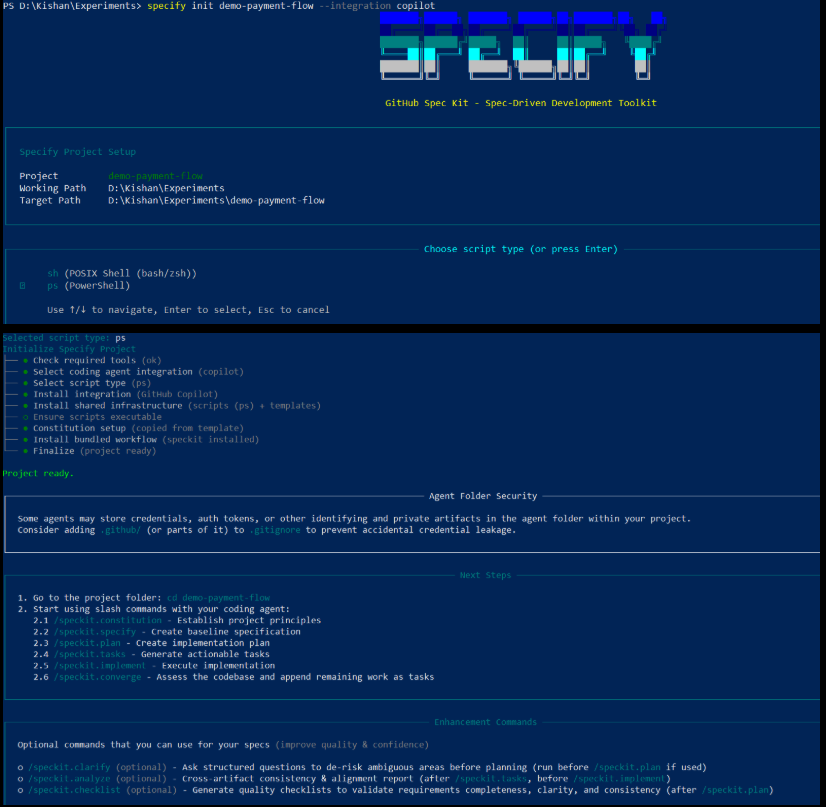
After installation, I initialised the project and began the setup process. The result was a workspace that included the relevant Speckit structure and exposed the different agents needed for the workflow.
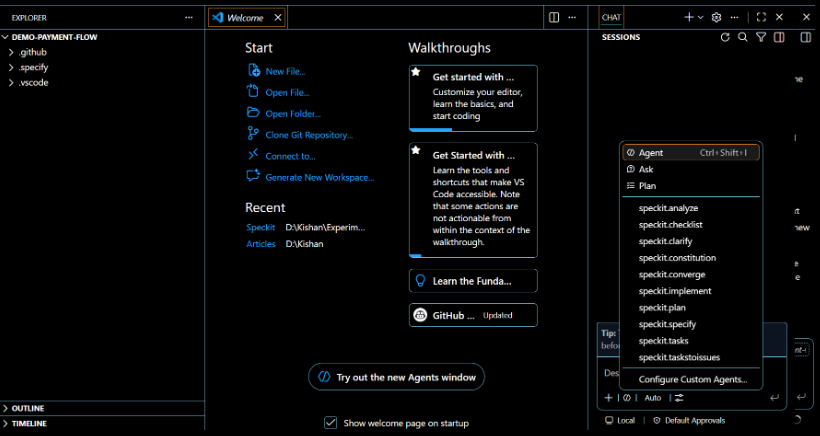
Opening the project in VS Code made the structure much easier to inspect. I could see the .specify folder and the available Speckit agents in the chat session, which made the workflow feel more tangible from the start.
Step 2: Create the Constitution
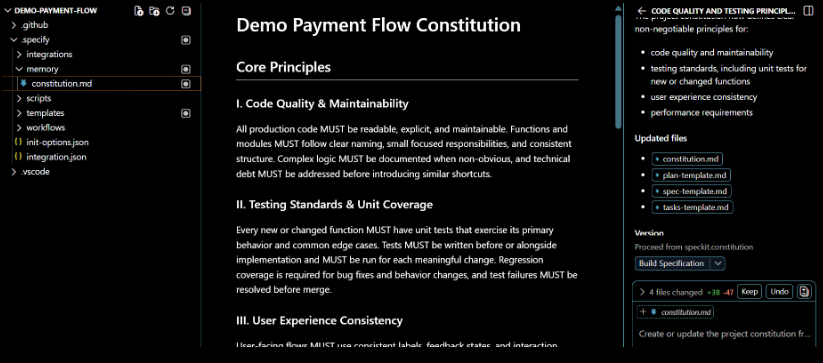
GitHub Copilot CLI uses /agents to select the appropriate agent or address it directly in a prompt. In this step, I used the /speckit.constitution command to define the project’s guiding principles and development standards.
The purpose of the constitution is to establish a baseline for how the work should be approached. In my case, I focused on code quality, testing expectations, user experience consistency, and performance requirements. I also made it explicit that unit tests should be included for core functions.
Below is the prompt I used:
/speckit.constitution Create principles focused on code quality, testing standards, user experience consistency, and performance requirements. I want unit tests to be included for functions.
I also reviewed the constitution carefully and adjusted it where needed. In my view, this is one of the most interesting shifts introduced by AI-assisted development: the human role becomes less about writing every line of code and more about acting as a quality gate, reviewing generated artefacts, and guiding the system toward better outcomes.
Step 3: Document the Specifications
Once the constitution was in place, I moved on to the actual feature specification. This was the point where I described the payment flow in enough detail for the system to generate a useful implementation foundation.
The prompt I used for this step was intended to capture the most important business behaviours clearly:
/speckit.specify Build a payment flow that allows users to select a payment method, enter and verify their card details, process the payment, handle declined transactions gracefully with clear error messages, and display obvious success or failure states after the transaction is completed.
I also made sure to use the appropriate agent for this stage, which in this case was the speckit specify agent. The output was a spec.md file containing user stories and supporting requirements.
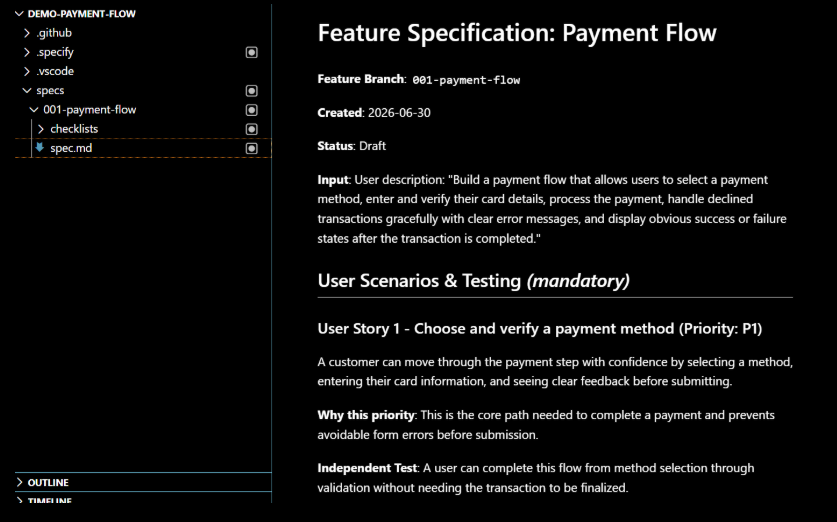
After generation, I reviewed the specification carefully and refined it where needed. That review step is important because it ensures the generated work still reflects the product intent rather than simply repeating the first draft of the prompt.
Step 4: Create a Technical Implementation Plan
With the requirements documented, the next step was to turn them into a technical plan. I used the /speckit.plan command to outline the architecture and the stack I wanted to use for the implementation.
The prompt I used reflected a lightweight approach based on Vite and minimal dependencies. I chose vanilla HTML, CSS, and JavaScript wherever possible and planned to simulate payment processing rather than integrate a real payment gateway. The plan also included client-side validation and mock API responses for both successful and declined transactions.
/speckit.plan The application uses Vite with minimal dependencies. Use vanilla HTML, CSS, and JavaScript wherever possible. Simulate payment processing without integrating a real payment gateway. Validate card details on the client side and use mock API responses for successful and declined transactions.
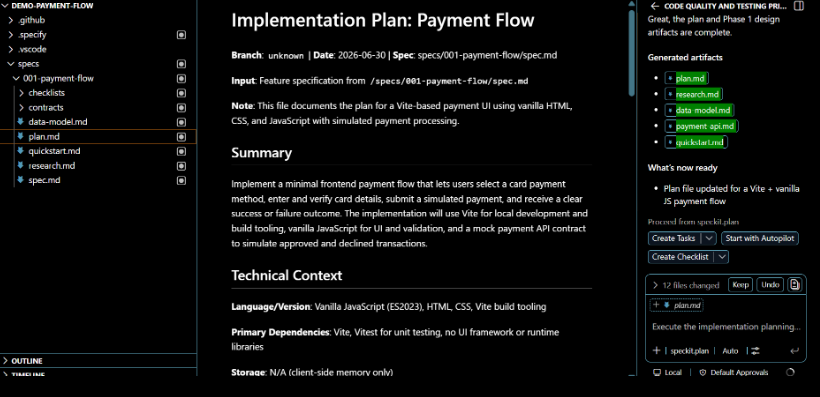
The resulting plan covered the main areas of the implementation, including the technical approach, research notes, contracts for the simulated API, and a quickstart section for running and testing the feature. In a typical project lifecycle, this is the stage where an architect or technical lead would review and validate the proposed direction before implementation begins.
Step 5: Create the Tasks
The next stage was breaking the plan into concrete execution tasks. This is where the workflow becomes especially useful, because it transforms a broad implementation idea into a sequence of small, manageable units of work.
I used the /speckit.tasks command to generate the task list, and the output was a tasks.md file containing the work items needed to build the feature.
/speckit.tasks
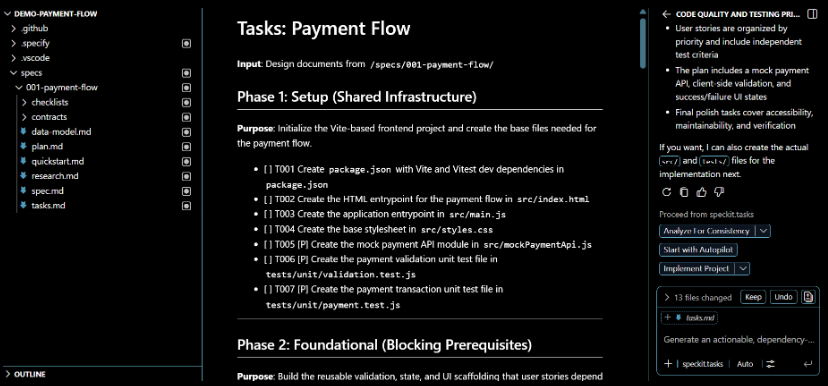
This step helps keep execution organised and makes it easier to track progress as the implementation unfolds.
Step 6: Execute the Implementation
Once the tasks were defined, I moved to implementation. Running /speckit.implement generated the source folder and the test folder, which gave the project a concrete structure to work from.
/speckit.implement

What stood out here was the speed with which a functional foundation could be produced. The generated code was not the final answer, but it gave me a solid starting point that I could review, refine, and adapt.
Step 7: Run the Code Locally
After implementation, I ran the feature locally to validate the experience. The workflow was simple:
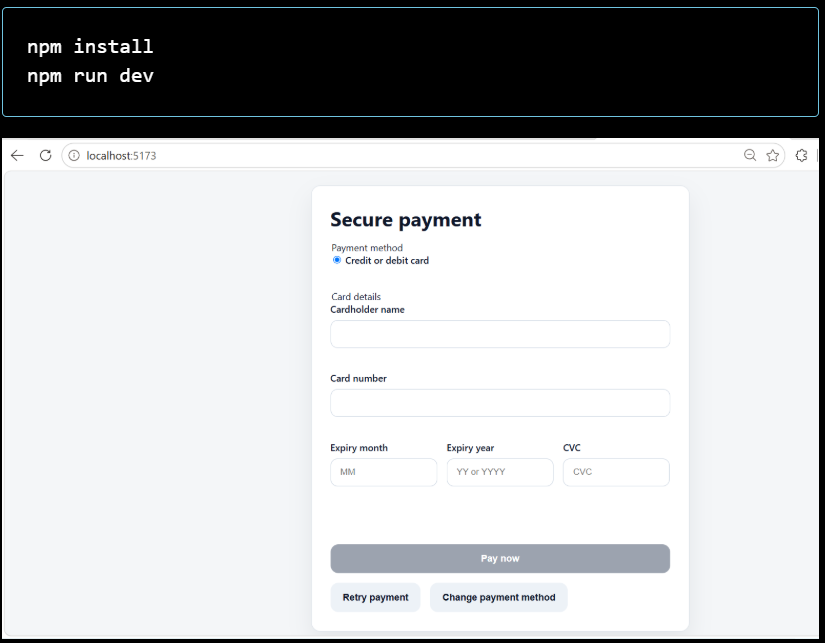
Seeing the application run locally made it easier to evaluate the user experience and confirm that the implementation matched the intended behaviour. It also highlighted the practical value of having a spec in place: I could compare what was built against what had been defined earlier in the process.
Step 8: Evolve the Spec with New Requirements
The final step is one that is often overlooked, but in my experience it is just as important as the earlier ones. Requirements rarely stay static. In a real checkout flow, that might mean supporting saved cards, introducing 3D Secure, or addressing new edge cases around payment retries.
When those changes arise, I update the specification rather than letting the implementation drift away from the original intent. That is one of the main reasons this workflow feels sustainable to me: it creates a rhythm in which product thinking and engineering can evolve together instead of diverging.
What I Learned
Working through this process reinforced a few clear lessons for me:
- fewer misunderstandings between team members,
- smoother handoffs from design to engineering,
- faster alignment during reviews,
- and a clearer understanding of what “done” really means.
The biggest takeaway was that spec-driven development is not about slowing the team down. When done well, it reduces ambiguity, improves coordination, and gives both humans and AI tools a stronger foundation to work from.
Conclusion
What I took away from the experience was not just a better specification, but a better way of working. The feature felt more complete before the first line of code was even written, and that is exactly the kind of leverage I find most valuable in modern development workflows.
What’s Your Take?
As a new author on Medium, my goal is to share these insights while continuously refining my own perspective. Constructive feedback is my primary source of improvement, and I would love to hear from you to make the next pieces even better:
- What could have been written better? Were there sections that felt too abstract, or areas where the phrasing could be sharper?
- What additional information would be helpful? Are there specific challenges with spec-driven development — like handling changing requirements midway — that you’d want me to cover next?
- How does your team handle this? Is there a specific delivery methodology your team is using alongside this new way of development?
Drop your thoughts, critiques, and experiences in the comments below. Let’s learn from each other!
Spec-Driven Development in Action with GitHub Speckit was originally published in Towards AI on Medium, where people are continuing the conversation by highlighting and responding to this story.