
How to Run Your Own AI Assistant for Free -OpenClaw on Oracle Cloud with Ollama
How to Run OpenClaw on Oracle Cloud with Ollama for Free
Introduction
Ever wished you had your own personal AI assistant that runs on your own server, stays connected 24/7, and integrates with your messaging apps? That’s exactly what OpenClaw (formerly Clawdbot / Moltbot) does.

OpenClaw is an open-source personal AI assistant that you can run on a VPS (Virtual Private Server) or on your desktop system. Once set up, it connects to platforms like Telegram, WhatsApp, or Discord — and you can chat with it just like you would with ChatGPT, but it’s running on your own infrastructure inside your own ecosystem. So it has access to your files, folders, and software such as browsers.
In this tutorial, I’ll show you how to set up OpenClaw completely for free using Oracle Cloud’s Always Free tier.
We’ll use Ollama Cloud to power the AI models. Unlike the official docs that recommend Tailscale, I’ll walk you through accessing OpenClaw directly via your Oracle instance’s public IP — which is simpler if you don’t want to set up Tailscale. Opting for Tailscale is better if you want to have a more secure connection to your server.
Why OpenClaw?

Before we dive into the setup, let’s talk about why you’d want to run OpenClaw on a hosted server:
- Proactive Assistance: OpenClaw doesn’t wait for you. It can be set to monitor your emails or server logs and alert you only when something actually needs your attention.
- System Access: Since it lives on your server, it has “hands.” It can write code, move files, and run terminal commands to manage your digital life. Connect to Telegram, WhatsApp, Discord, Signal, iMessage — or all of them, along with tools like a browser for web search.
- Total Privacy: By using Ollama on your own hardware, your data never leaves your instance. You get the intelligence without the data mining.
What You’ll Need
Before we begin, make sure you have:
- An Oracle Cloud account (free sign-up)
- A computer to SSH into your server (Mac/Linux terminal or Putty on Windows)
- Ollama account
- About 30–45 minutes of free time and a lot of patience
Step 1: Sign Up for Oracle Cloud
If you don’t already have an Oracle Cloud account, head to https://www.oracle.com/in/cloud/free/ and sign up. Oracle’s process is slow, so each step may take some time for verification and activation.
Step 2: Create Your Oracle Cloud Instance
Let’s set up the virtual machine that will run OpenClaw:
- Log into Oracle Cloud Console at https://cloud.oracle.com/
- Navigate to Compute → Instances
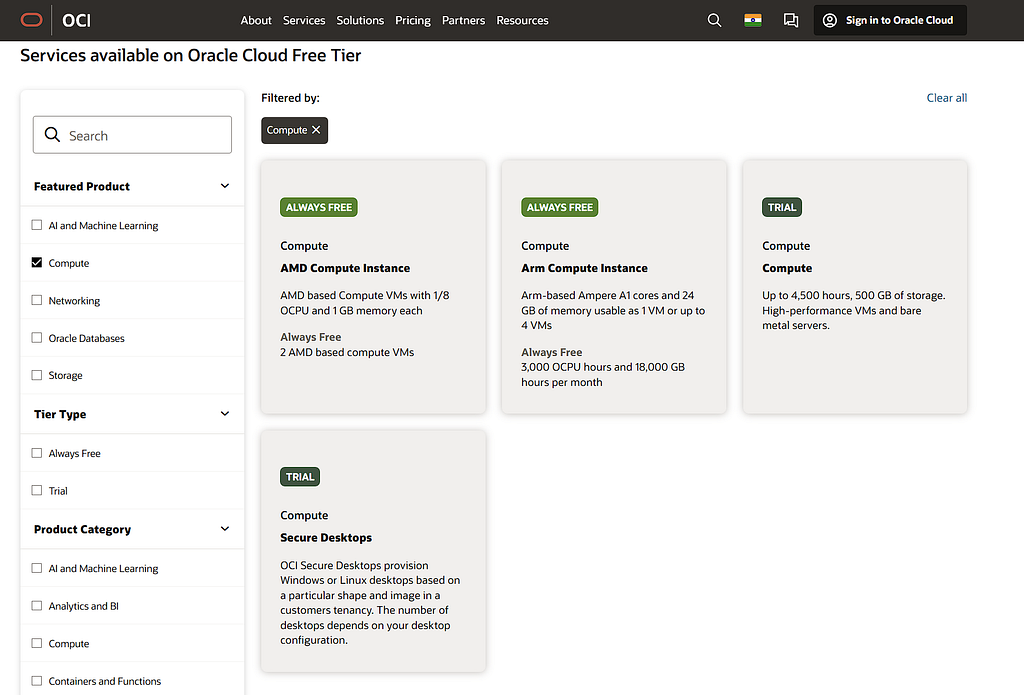
- Click Create Instance

Configure your instance with these settings:
**Name** `openclaw`
**Image** Ubuntu 24.04 (aarch64)
**Shape** VM.Standard.A1.Flex (Ampere ARM)
**Boot Volume** 200 GB
Don’t forget to download the SSH public and private key during this process, otherwise you will not be able to access your instance from your local machine.
Important Note: Oracle’s free tier has some quirks. When you click on create instance, you might see this error —
If you get an “Out of capacity” error, try a different availability domain or retry later. Free tier capacity is limited and in high demand.
If this happens, you’ll need to upgrade to Pay-As-You-Go — don’t worry, you won’t be charged. Add your credit card details, and after upgrading, you should be able to create your instance.
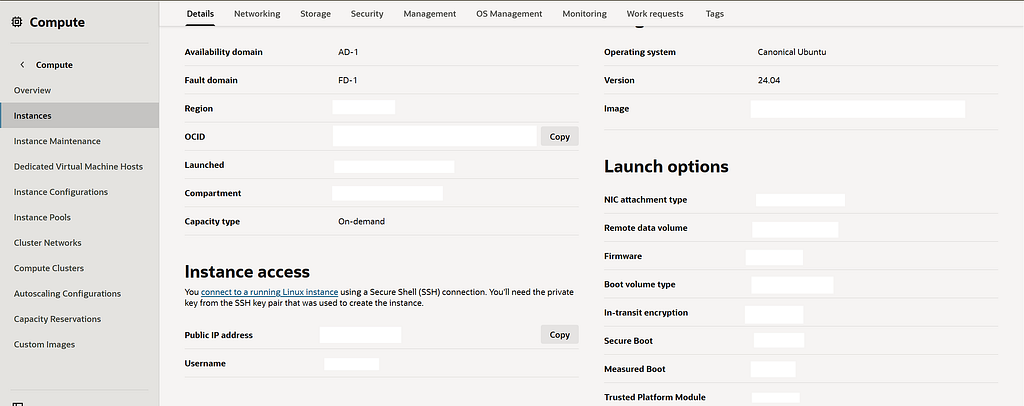
Once created, you will need to generate the Public IP address of your instance. Note this down — you’ll need it to access the OpenClaw UI.
Scenario 1: Finding your IP (If it already exists)
If your instance is already running and you just need the address for SSH:
- Log in to the Oracle Cloud Console.
- Go to Compute → Instances.
- Click on your Instance Name.
- Look at the Instance Access section on the right side of the page. Your Public IP Address will be listed there.
Scenario 2: Generating a New Public IP (If “Not Assigned”)
If the field above says “Not Assigned” or is blank, you need to manually generate and attach one.
- On your Instance Details page, click on the instance and head over to the Networking tab.
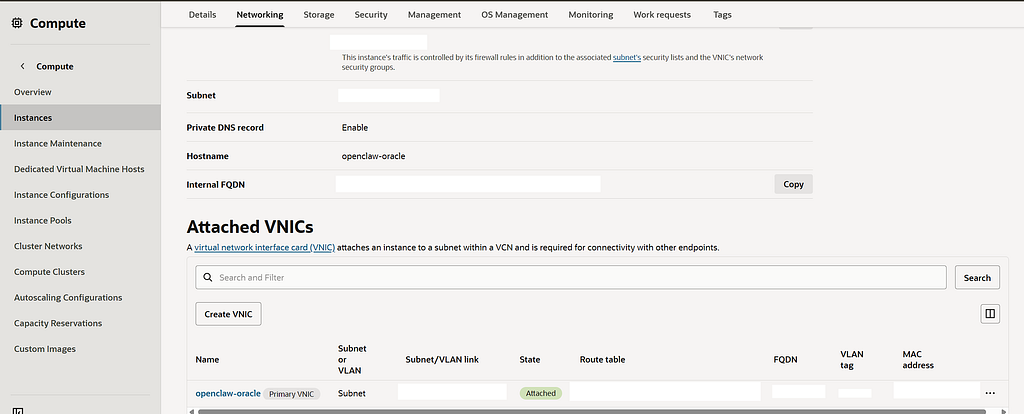
2. Click Attached VNICs.
3. Click the Name of the Primary VNIC (it usually ends in (Primary)).
4. On the VNIC details page, click IPv4 Addresses under the Resources menu.
5. You will see a table with your Private IP Address. Click the three dots (⋮) on the far right of that row. Select Edit.
6. In the pop-up window, look for the Public IP Type section:
- Ephemeral Public IP: Oracle generates a random IP for you. It stays as long as the instance is running, but if you terminate the instance, the IP goes back to the pool. (Best for most users).
- Reserved Public IP: You “buy” (reserve) a specific IP address that stays with your account forever. You can move it between different servers.
7. Click Update. You should be able to see your Public IP now.

Step 3: SSH Into Your Instance
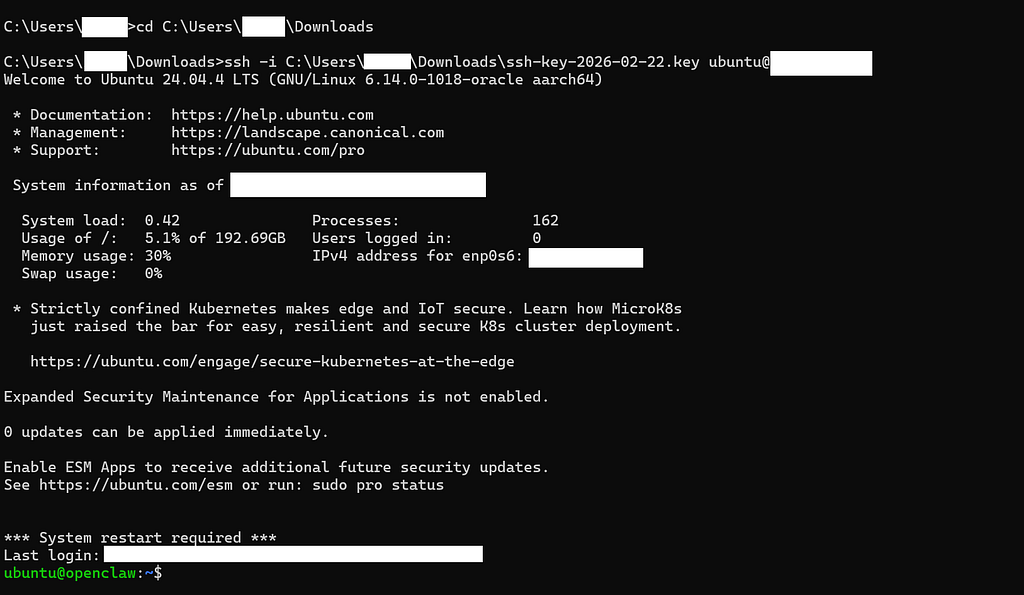
Now let’s connect to your new server. On your local system, open the folder where you have saved your SSH keys and open a terminal instance inside the same folder:
ssh -i /path/to/your/private_key_file ubuntu@YOUR_PUBLIC_IP
Replace YOUR_PUBLIC_IP with the IP address Oracle gave you.
On first connection, you’ll see a security warning. Type yes to continue.
Step 4: Update Your Server
Once connected, let’s make sure everything is up to date:
sudo apt update && sudo apt upgrade -y
sudo apt install -y build-essential
The build-essential package is important — it includes compilers needed for some ARM-native builds.
Step 5: Configure User and Hostname
Set up your server with a proper hostname:
# Set hostname
sudo hostnamectl set-hostname openclaw
# Set password for ubuntu user (optional but recommended)
sudo passwd ubuntu
# Enable lingering (keeps services running after you disconnect)
sudo loginctl enable-linger ubuntu
Step 6: Install Ollama
Ollama lets you run AI models locally on your server. In this tutorial, we’ll use Ollama Cloud, which provides API access to various models without needing to download them to your server.
Ollama Cloud offers a free tier with generous limits:
| Feature | Free Tier | Paid Tier |
| - - - - -| - - - - - -| - - - - - -|
| **Requests** | 100/hr | 10,000/hr |
| **Tokens** | 16k/hr | 128k/hr |
| **Speed** | 50 t/s | 150 t/s |
| **Models** | 7B only | Larger models |
To use Ollama Cloud:
- Sign up at https://www.ollama.com/
- Get your API key
- Export it on your server:
export OLLAMA_API_KEY=your_api_key_here
4. Install Ollama in the server
curl -fsSL https://ollama.com/install.sh | sh
ollama pull minimax-m2.5:cloud
Step 7: Install OpenClaw
Now for the main event — installing OpenClaw:
Run the command
curl -fsSL https://openclaw.ai/install.sh | bash
source ~/.bashrc
When prompted with “How do you want to hatch your bot?”, select ”Do this later” — we’ll configure it manually.
Note: OpenClaw needs Node.Js to be at least v22, and you might face an error stating that you need to upgrade your Node version. In that case, run the commands —
npm rm -g openclaw
npm i -g openclaw
curl -fsSL https://deb.nodesource.com/setup_22.x | sudo -E bash -
Step 8: Configure OpenClaw Gateway
Let’s set up the Gateway so you can access OpenClaw via your public IP:
# Make the Gateway accessible on all network interfaces
openclaw config set gateway.bind "0.0.0.0"
# Set authentication mode to token (more secure)
openclaw config set gateway.auth.mode token
# Generate an auth token
openclaw doctor - generate-gateway-token
Since we’re using public IP access, we need to open the port:
sudo ufw allow 18789/tcp
sudo iptables -I INPUT -p tcp - dport 18789 -j ACCEPT
Now start the Gateway:
openclaw gateway start
Now start the onboarding process with Ollama
ollama launch openclaw
This will open a TUI (Terminal User Interface) where you will be asked to choose the Ollama model — by default, minimax 2.5 cloud will be selected. Go through the process.
Step 9: Connect Your Messaging Platform
You will be asked at the end to select which messaging platform to use. Recommendation is to use Telegram.

- Open Telegram app (web/mobile) and search for @BotFather
- Create a new bot with /newbot
- Give it a name, and it will generate a token. Copy your bot token
- Paste it inside the OpenClaw configuration.
- Now complete the pairing. Open your bot in telegram app and send a “hi” or /pair to the bot. It should generate a pairing code.
- Add the pairing code to OpenClaw
openclaw pairing approve telegram <YOUR_CODE>
Step 10: Verify Everything is Working
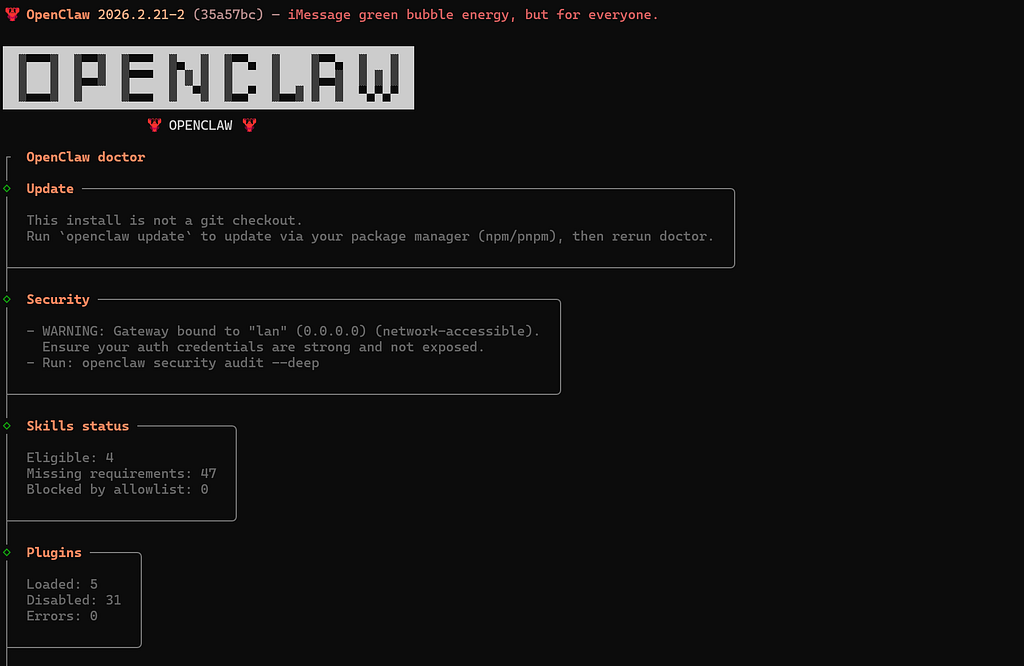
Let’s make sure OpenClaw is running correctly:
# Check version
openclaw - version
# Check daemon status
systemctl - user status openclaw-gateway
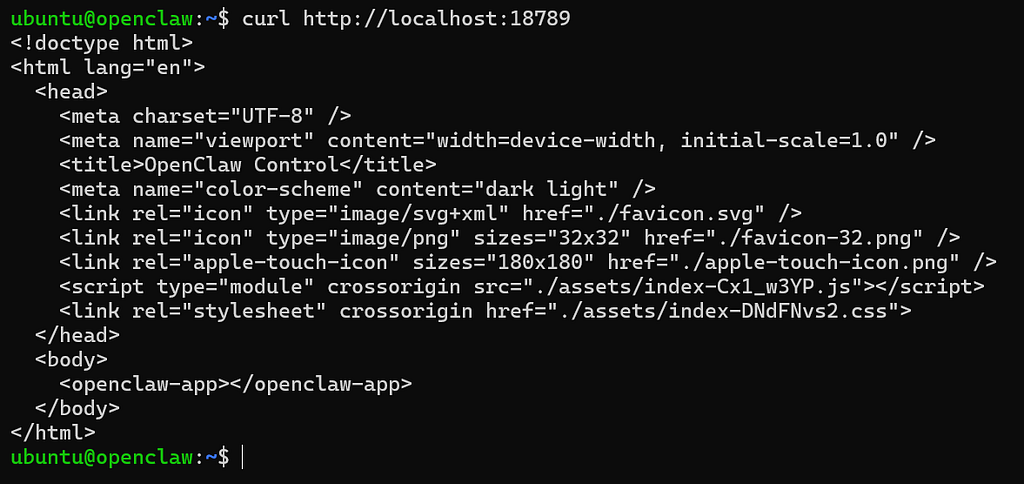
# Test the gateway
curl http://localhost:18789
If everything has been done correctly, you should see a response like this –
If you don’t, then you should see an error or simply no response. At this stage, i would recommend checking with Google AI or ChatGPT to figure out whats the issue and how to solve it (this is where the patience part comes in).
Step 11: Generate an authentication token to access the OpenClaw UI
Once you get a successful response, generate the authentication token by running the command —
openclaw config set gateway.auth.mode token
openclaw doctor --generate-gateway-token
Step 12: Accessing Your OpenClaw
Now for the moment of truth! Open your browser and visit:
http://YOUR_PUBLIC_IP:18789/#token=95ee707af9bc4dXXXXXXXXXXXXXXXXXXXXXXX
You should see the OpenClaw Control UI.

Try to message the bot in the chat and see what happens. Sometimes you might face an error. In that case, copy and paste the below JSON in the Config screen —
{
  "meta": {
    "lastTouchedVersion": "2026.2.21-2",
    "lastTouchedAt": "2026-02-22T13:14:03.511Z"
  },
  "wizard": {
    "lastRunAt": "2026-02-22T09:15:08.977Z",
    "lastRunVersion": "2026.2.21-2",
    "lastRunCommand": "onboard",
    "lastRunMode": "local"
  },
  "auth": {
    "profiles": {}
  },
  "models": {
    "mode": "merge",
    "providers": {
      "ollama": {
        "baseUrl": "http://127.0.0.1:11434/v1",
        "apiKey": "__OPENCLAW_REDACTED__",
        "api": "openai-completions",
        "models": [
          {
            "id": "minimax-m2.5:cloud",
            "name": "minimax-m2.5:cloud",
            "reasoning": false,
            "input": [
              "text"
            ],
            "cost": {
              "input": 0,
              "output": 0,
              "cacheRead": 0,
              "cacheWrite": 0
            },
            "contextWindow": 131072,
            "maxTokens": 16384
          }
        ]
      }
    }
  },
  "agents": {
    "defaults": {
      "model": {
        "primary": "ollama/minimax-m2.5:cloud"
      },
      "workspace": "/home/ubuntu/.openclaw/workspace"
    }
  },
  "commands": {
    "native": "auto",
    "nativeSkills": "auto",
    "restart": true,
    "ownerDisplay": "raw"
  },
  "hooks": {
    "internal": {
      "enabled": true,
      "entries": {
        "boot-md": {
          "enabled": true
        },
        "session-memory": {
          "enabled": true
        }
      }
    }
  },
  "channels": {
    "telegram": {
      "enabled": true,
      "dmPolicy": "pairing",
      "botToken": "__OPENCLAW_REDACTED__",
      "groupPolicy": "allowlist",
      "streaming": false
    }
  },
  "gateway": {
    "port": 18789,
    "mode": "local",
    "bind": "lan",
    "controlUi": {
      "allowInsecureAuth": true,
      "dangerouslyDisableDeviceAuth": true
    },
    "auth": {
      "mode": "token",
      "token": "__OPENCLAW_REDACTED__"
    },
    "trustedProxies": [
      "127.0.0.1"
    ],
    "tailscale": {
      "mode": "off",
      "resetOnExit": false
    }
  },
  "plugins": {
    "entries": {
      "telegram": {
        "enabled": true
      }
    }
  }
}
Once you start seeing responses from the bot, head over to Telegram and talk to you bot, your AI assistant should respond.
Security Considerations
Since we’re using public IP access (not Tailscale), a few security notes:
- Port 18789 — Only open if needed; otherwise restrict to localhost
- API Token — Keep it secret! Don’t share in plain text
- Updates — Run sudo apt update && sudo apt upgrade regularly
- Firewall — Consider using UFW for additional protection
Conclusion
Congratulations! If you have made it this far, I am assuming you now have your own AI assistant running on Oracle Cloud — completely free! Since it’s an open source project, setting it up will have a lot of hiccups. While this guide has tried to sort most of the steps out, you may still be required to troubleshoot — the good thing is that Google AI mode or ChatGPT can really help you out.
Personally, I have been able to run the bot, and it’s running nicely without any additional cost so far. If the rate limits get updated, then some payment might be needed, but as of now, it’s working smoothly on free infrastructure.
How to Run Your Own AI Assistant for Free -OpenClaw on Oracle Cloud with Ollama was originally published in Towards AI on Medium, where people are continuing the conversation by highlighting and responding to this story.