")
What Are Skills and How Do You Use Them? (Cursor, Claude Code)
You’ve probably caught yourself copy-pasting the same instructions into AI chats over and over again: “Write in TypeScript,” “Don’t use third-party libraries,” “Add tests.” In programming, we would basically call this a violation of the DRY (Don’t Repeat Yourself) principle. So why do we keep doing it when working with neural networks?
You’ve probably caught yourself copy-pasting the same instructions into AI chats over and over again: “Write in TypeScript,” “Don’t use third-party libraries,” “Add tests.” In programming, we would basically call this a violation of the DRY (Don’t Repeat Yourself) principle. So why do we keep doing it when working with neural networks?
In this article, we’ll break down the concept of Skills — reusable “capabilities” for AI assistants that live directly inside your repository and make agent workflows more predictable, cleaner, and more professional.
What Are “Skills” (Really)?
In short, a Skill is a persistent playbook that trains an AI to perform a specific type of task according to your standards.
A regular prompt is just a one-off request.
A Skill is a system component: it’s versioned in Git, lives inside the project folder, and is automatically loaded by the agent whenever a relevant task comes up.
How Is a Skill Different from a System Prompt?
A system prompt (for example, in Claude or Cursor settings) defines a global role — something like “You are a programmer.”
A Skill is a narrow specialization — for example: “You are an expert in writing PRDs for no-code MVPs.”
In practice, the problem is usually not that the model “answers badly.”
The real problem is that we do not formalize our working standards.
In traditional software development:
- code style is enforced by linters,
- architecture is enforced by repository rules,
- processes are enforced through PR templates, DoD, and CI.
It’s the same with AI — except that instead of a “compiler,” we have an agent that keeps trying to guess what you meant every time.
One Important Point
This is not a “Cursor feature” or a “Claude Code feature.”
It’s a layer on top of the tools that makes agent behavior portable.
Anatomy of an Ideal Skill
A good Skill should not be vague. If you write something like “write good code,” the AI will ignore it. For a Skill to work, it should include:
- Scope — when exactly should this Skill be activated?
(For example: “when creating a new endpoint”) - Context & Inputs — what information does the agent need to gather before starting?
- Process (Algorithm) — a step-by-step plan (Chain of Thought)
- Output Format — the response structure (Markdown templates, JSON schemas)
- Quality Bar (Checklist) — self-check criteria for the model
- Anti-patterns — what must never be done
To avoid writing a separate instruction for Cursor, another one for Claude Code, and another one for Warp, you create one unified structure, and the tools simply read it.
Recommended structure:
.ai/
  AGENTS.md          # global project rules(always-on)
  router.md          # skill selects
  skills/
    prd_mvp_nocode.md
    code_review.md
    webapp_testing.md
    research.md
  subagents/         # optional: roles for not common tasks
    planner.md
    reviewer.md
Where to Put What (So It Doesn’t Turn Into a Mess)
AGENTS.md contains the project’s “rules”:
- working style (minimal changes, don’t invent things),
- clarifying-question policy,
- default response format,
- security rules and prohibitions.
skills/ contains specific playbooks (the ones we actually use):
- PRD writing,
- code review,
- testing,
- research,
- migrations, etc.
router.md contains the selection logic:
- “If the task is about tests → use webapp_testing.md”
A Minimal Skill Example: “Webapp Testing”
You may have already seen a format like this:
---
name: webapp-testing
description: Toolkit for interacting with and testing local web applications using Playwright.
---
Why This Works?
- name / description act as activation triggers
- then comes how to think and what to return (process + output contract)
But if you want a Skill to produce reliable results every time, add
Output Requirements:
- always return a runnable script,
- always use networkidle,
- always call browser.close(),
- include 1–2 commands for how to run it.
And that’s it — now you have an “employee” who writes automated tests consistently.
A Practical Skill Template (Universal)
Here’s an “ideal skeleton” you can copy:
---
name: <skill-name>
description: <one-line>
triggers: [<keywords>]
---

# Purpose
<what this skill is for>

# When to use
<exact situations>

# Inputs needed
- ...
- ...

# Procedure
1) ...
2) ...
3) ...

# Output format
- Section 1
- Section 2
- ...

# Quality bar (self-check)
- [ ] ...
- [ ] ...

# Anti-patterns
- ❌ ...
- ❌ ...

# Examples
Input: ...
Output: ...
How Does the Agent Know Which Skill to Activate?
This is an important engineering detail. This is exactly where routers come in — without them, even perfect Skills will behave inconsistently, because the agent will not always infer the right one on its own.
A simple and practical router.md:
- Determine the task type: product / engineering / testing / research / writing
- Select the corresponding file in .ai/skills/
- Follow it strictly
- End with a self-check against the Quality Bar
Example entry for AGENTS.md:
## Mandatory startup
Before starting any task:
1) Read `.ai/router.md`
2) Follow it to select exactly one skill from `.ai/skills/`
3) Follow the selected skill's Output format and Quality bar
Example of Using router.md:
# Router: Skill Selection & Execution Protocol

## Goal
Route each user request to exactly ONE most relevant skill in `.ai/skills/` and produce the required artifact consistently.

## Step 0 — Task classification (mandatory)
Classify the request into ONE primary category:

- **product**: PRD, requirements, MVP scope, user stories, acceptance criteria, roadmap
- **engineering**: implementation, refactoring, debugging, architecture, PR changes
- **testing**: e2e/ui tests, Playwright, test plan, QA steps, screenshots/logs
- **research**: competitor analysis, tech landscape, tool comparison, citations
- **writing**: article drafts, posts, editing tone, structure, storytelling

If multiple categories apply, choose the one that best matches the **final deliverable**.

## Step 1 — Skill mapping (choose ONE)
Choose the best matching skill file (exactly one) using this priority order:
1) explicit user request (“use skill X”)
2) keyword match with skill `name/description/triggers`
3) closest deliverable match from the table below

### Skill table
| Category | Skill file | Use when |
|---|---|---|
| product | `.ai/skills/prd_mvp_nocode.md` | PRD/MVP, no-code/vibe constraints |
| product | `.ai/skills/jira_sprint_ac.md` | Sprint tasks + Acceptance Criteria + DoD |
| engineering | `.ai/skills/code_review.md` | Review PR / risks / architecture / tests |
| testing | `.ai/skills/webapp_testing.md` | Local webapp testing with Playwright |
| research | `.ai/skills/research_competitors.md` | Competitor research / tool landscape |
| writing | `.ai/skills/article_habr.md` | Habr/VC article structure and tone |

If no skill matches, proceed with `AGENTS.md` default rules, but **still follow Output Contract** below.

## Step 2 — Execution rules (mandatory)
After selecting the skill:
- Read the chosen skill file fully.
- Follow its **Process** section step-by-step internally.
- Produce output strictly following its **Output format**.
- Apply the skill’s **Anti-patterns** as hard constraints.

## Output Contract (default)
Unless the selected skill overrides this, format every answer as:

1) **Plan** (2–6 bullets)
2) **Deliverable** (the artifact the user asked for)
3) **Self-check** (3–7 checklist items)

If the user explicitly asks for “just the final result”, omit the Plan and keep only Deliverable + Self-check.

## Safety / Quality gates (always-on)
- Do not invent files/APIs/metrics. If uncertain, state uncertainty and propose verification.
- Prefer minimal changes (smallest viable diff) when editing code.
- Avoid long explanations; be direct and artifact-first.
Core Idea
The point is that you are defining a thinking protocol. That is far more powerful than any generic “be smart” instruction.
Where Should You Store Skills?
For team collaboration and synchronization across AI tools, the best place is a folder at the root of your repository.
- Create a directory: .ai/skills/ (this is where your narrowly specialized Skill files will live).
- Main rules file: .cursorrules (for Cursor, for example).
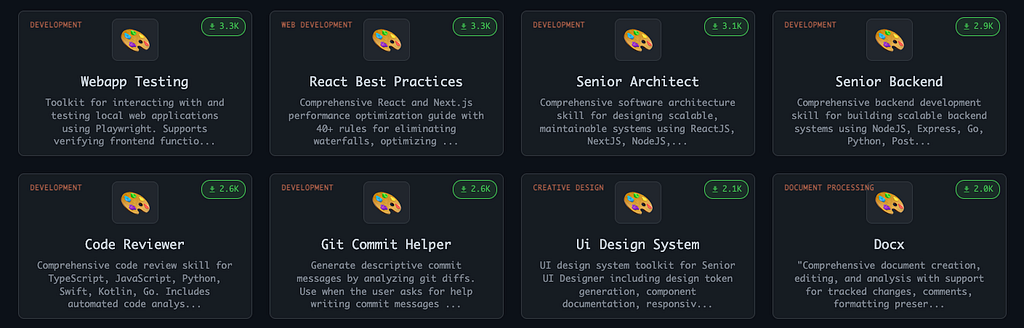
If you don’t want to write instructions from scratch, you can use ready-made templates (e.g., aitmpl.com). For example, there is already a proven “playbook” for web app testing (Webapp Testing).

You Can Install It in Your Project with a Single Terminal Command
npx claude-code-templates@latest --skill=development/webapp-testing --yes
Or Do It Manually (The Hard Way)
If you found a great Skill on aitmpl.com, you do not have to use the CLI.
- Go to the page for the Skill you need (for example, Webapp Testing).
- Copy the instruction’s Markdown code.
- Create a file called .ai/skills/webapp-testing.md and paste the code into it.

Final Thoughts
Why we need it? Why This Isn’t Nonsense
- Team synchronization if you work in a team, you commit the .ai/ folder to Git. Now Claude and Cursor behave consistently across the whole team. It becomes the project’s firmware.
- Tool independence: tomorrow a new “Cursor killer” might show up. You won’t need to relearn everything — you’ll just tell the new AI: “Your instructions are in that folder.”
- Speed: instead of pasting a wall of prompts, you simply say: “Use Skill X.”
Are you planning to use Skills in your projects?
If you enjoyed this article, I’d be grateful for your support
I’m a Product Manager with an engineering background (ex SWE), focused on building, scaling and growing products. I’m especially interested in new technologies, particularly AI/ML, and how they can be applied in real workflows.
Email: akzhankalimatov@gmail.com
✅ Connect with me on LinkedIn, X (Twitter)
✅ Press and hold the 👏 to give up to 50 claps for this article
What Are Skills and How Do You Use Them? (Cursor, Claude Code) was originally published in Towards AI on Medium, where people are continuing the conversation by highlighting and responding to this story.